Problem
How do I set up outbound SMTP in BoxBillings?
Solution
The following example assumes you have already got a fully functional BoxBilling eCommerce solution installed.
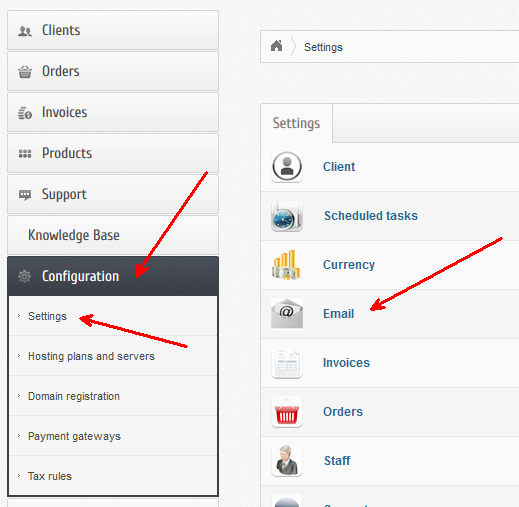
Log into your BoxBilling Admin area.
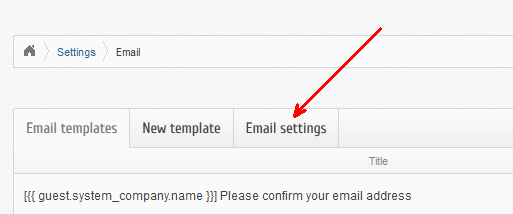
Under the Configuration Menu select "Settings", followed by "Email"
Now select the tab "Email Settings"

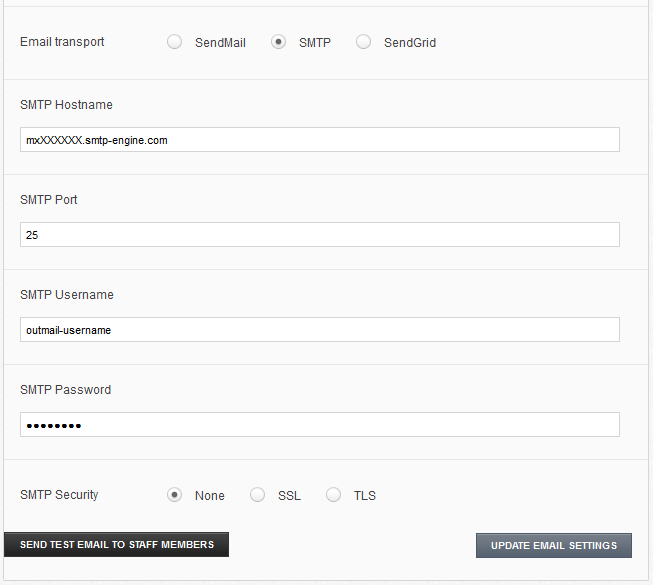
Set the "Email transport" as "SMTP".
Then enter the outMail settings you were provided with.

- SMTP Hostname = <outMail server provided in the welcome email>
- SMTP Port = 25 (or 587, 2525 or 8025)
- SMTP Username = <outMail username provided in the welcome email>
- SMTP Password = <outMail password provided in the welcome email>
- SMTP Security = None (see notes below on other options)
- Click "Update Email Settings"
Using SSL or TLS
First get the connector running with the Protocol set to none.
Once you're happy its working you can enable SSL or TLS encryption options by changing the "SMTP Security" field.
For SSL, remember you will need to change the port to 465.
For TSL, all ports are supported.
Video Tutorial
Summary of server details
|
Outgoing server |
mxXXXXXX.smtp-engine.com As provided in your signup email. |
|
Outgoing server protocol |
SMTP |
|
Outgoing server port |
25, 465, 587, 2525 or 8025 |
|
Authentication Type |
Basic Authentication, SSL and TLS supported |
|
Username |
As provided |
|
Password |
As provided |
Uninstalling / Removing outMail
To change your outgoing SMTP server settings away from outMail simply follow the setup guide above and where asked to enter the outgoing SMTP mail server address and login credentials please use those provided to you for the service provider you are moving to.


